
Hire Category: JQuery Developer
From Idea to Reality: A Step-by-Step Guide to Building Your MVP
Introduction
Every successful product you see today, like Airbnb, Dropbox, or Instagram, started with a simple idea. However, an idea alone isn’t enough. Many promising concepts never make it to market because their execution is unclear, rushed, or doesn’t meet real user needs.

This is where a Minimum Viable Product (MVP) comes in. An MVP is the simplest, functional version of your idea that addresses a real problem for your audience. It’s not about creating a perfect product or adding every feature at once. Instead, it’s about testing, learning, and confirming your concept before putting in significant time and resources.
Starting with an MVP allows you to:
- Test if your idea resonates with real users.
- Save time and money by building only what’s essential.
- Gather feedback early to improve your product iteratively.
In this guide, we will walk you through the steps to turn your idea into reality. You will learn what to do and what to avoid, along with real-life examples of successful MVPs that started small but grew significantly. Whether you are an entrepreneur, a small business owner, or someone with an idea ready to take off, this guide will help you move from concept to execution with confidence.
What is an MVP?
A Minimum Viable Product (MVP) is the first working version of your idea. It includes just enough features to solve the main problem for your audience. Think of it as a test version; it demonstrates your concept in action without all the extra details.
It’s important to understand the difference between a prototype, an MVP, and a final product:
- Prototype: A rough draft or model of your idea. Often just a sketch or clickable mockup to show how it might work. It’s mostly for planning and testing ideas internally.
- MVP: A usable product that real people can try. It has the minimum features needed to address a real problem and gather feedback.
- Final Product: The polished, full-featured version of your idea, built after testing and learning from the MVP.
Example:
- Dropbox: Before building the full file-syncing software, Dropbox created a simple demo video showing how it would work. That MVP helped them test the idea and gather real interest before investing in development.
- Airbnb: Started by renting out a single apartment to see if people would pay to stay in someone else’s home. That small MVP validated the concept before scaling globally.
In short, an MVP is your safest first step. It helps you test if your idea addresses a real problem and if people are willing to use it. Plus, it allows you to do this without spending too much time or money at the start.
Why Start with an MVP?
Jumping right into creating a full product can be tempting, especially when your idea feels exciting. However, the truth is that many ideas fail not because they are bad but because they are not tested or are built too extensively.
Starting with an MVP offers you several benefits:
- Validate Your Idea Early
Instead of assuming people will love your idea, an MVP lets you test it with real users. You get to see if it solves a real problem and whether people are willing to use it.
- Save Time and Money
Building a full-fledged product requires significant resources. An MVP allows you to focus only on the core features that matter, reducing wasted effort on things people may not want.
- Learn from Real Feedback
Early users provide invaluable insights. Their feedback helps you improve, refine, and prioritize features for the final product.
- Reduce Risks
By testing your concept early, you avoid investing heavily in an idea that might not work. It’s a way to fail fast, learn fast, and adjust your plan.
Real-Life Example:
- Instagram: When Instagram started, it wasn’t the full-featured app we know today. Its MVP simply allowed users to take a photo, apply a filter, and share it. By focusing on this single feature, the founders validated user interest, collected feedback, and gradually added more features like stories and direct messages.
Step-by-Step Process: From Idea to MVP
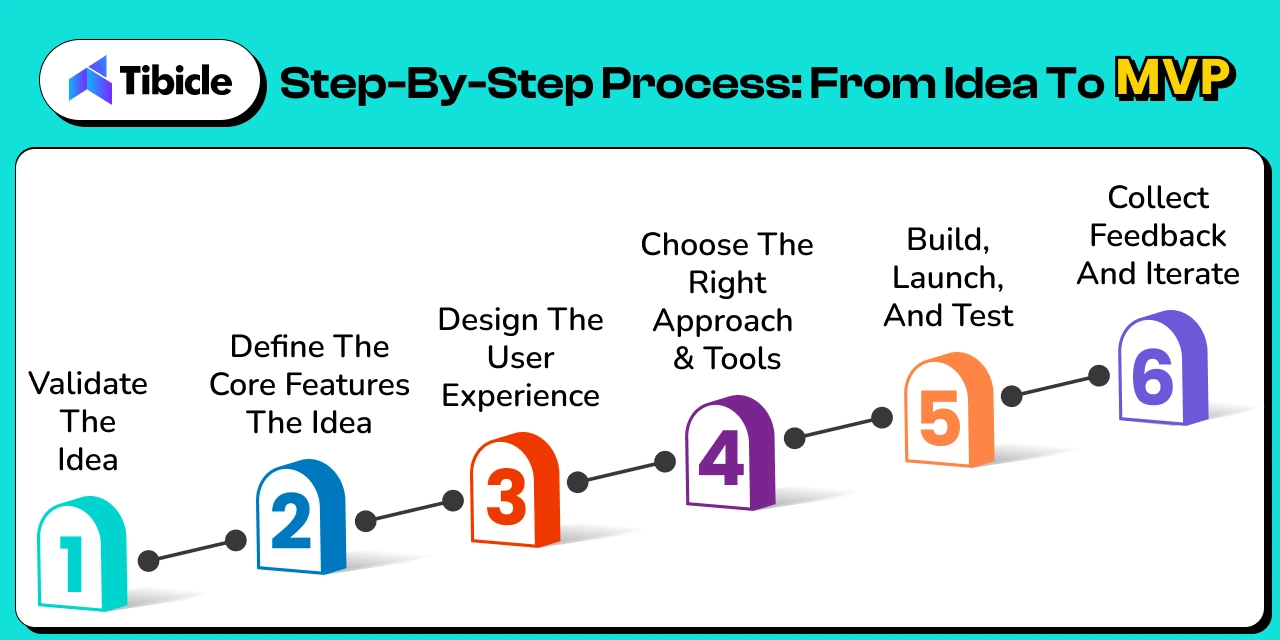
Step 1: Validate the Idea
Every idea seems exciting in your head. The real test is whether it solves a real problem for real people. Start by understanding your potential audience. What challenges do they face? How are they currently dealing with these challenges? Validation can be as simple as talking to potential users, observing existing solutions, or running small surveys.
The goal is to confirm demand before building anything. A validated idea gives you confidence that the problem is worth solving. This reduces the risk of wasted effort later.
Tip: Ask questions like:
|
Step 2: Define the Core Features
Once your idea is validated, focus on the essential features that solve the main problem. It’s easy to get carried away and add every feature you think of, but that complicates the MVP and slows down learning.
Make a list of must-have features that provide value right away. Everything else, like extra options or nice-to-haves, can wait until later. By keeping the MVP lean, you can launch quickly, test, and gather meaningful feedback.
| Tip: Prioritize features based on impact on the core problem. If a feature doesn’t directly solve it, leave it out for now. |
Step 3: Design the User Experience
With the main features defined, picture how users will engage with your product. Create wireframes, mockups, or simple sketches to plan the layout and flow. This helps you spot potential usability problems and makes sure everyone on your team understands how the MVP should function.
Even a basic, clickable prototype can be effective. It’s not about creating something flawless; it’s about turning your idea into something real, testable, and easy to grasp.
| Tip: Focus on clarity of navigation and user flow rather than polished visuals. Early feedback is more valuable than perfect design. |
Step 4: Choose the Right Approach & Tools
Decide how to build your MVP based on your skills and resources. Non-technical founders can use no-code or low-code platforms to launch quickly. More complex ideas may need you to work with developers or IT service providers.
Focus on speed, flexibility, and ease of iteration. Avoid complicating things with advanced tools or features that aren’t necessary for testing your concept.
| Tip: Pick tools that allow fast changes based on user feedback. The MVP should be easy to adapt. |
Step 5: Build, Launch, and Test
Now it’s time to launch your MVP. Concentrate on the main features and release it to a small, specific audience. Early testing allows you to see how users engage, what they enjoy, and what leads to difficulties.
This stage focuses on learning, not perfection. The information you collect is crucial for improving your product, addressing usability problems, and figuring out which features are genuinely valuable.
| Tip: Treat this as an experiment, collect user feedback, track behavior, and make improvements step by step. |
Step 6: Collect Feedback and Iterate
Launching the MVP is just the beginning. Engage with early users to understand their experiences and improve based on their insights. Add features gradually, but only when they address real, verified problems.
Iteration helps your product develop based on actual user needs instead of guesses. A product built this way has a much better chance of success when you scale.
| Tip: Keep a feedback log and prioritize improvements based on impact versus effort. Consistent small updates often lead to the most meaningful results. |
What NOT to Do When Building an MVP
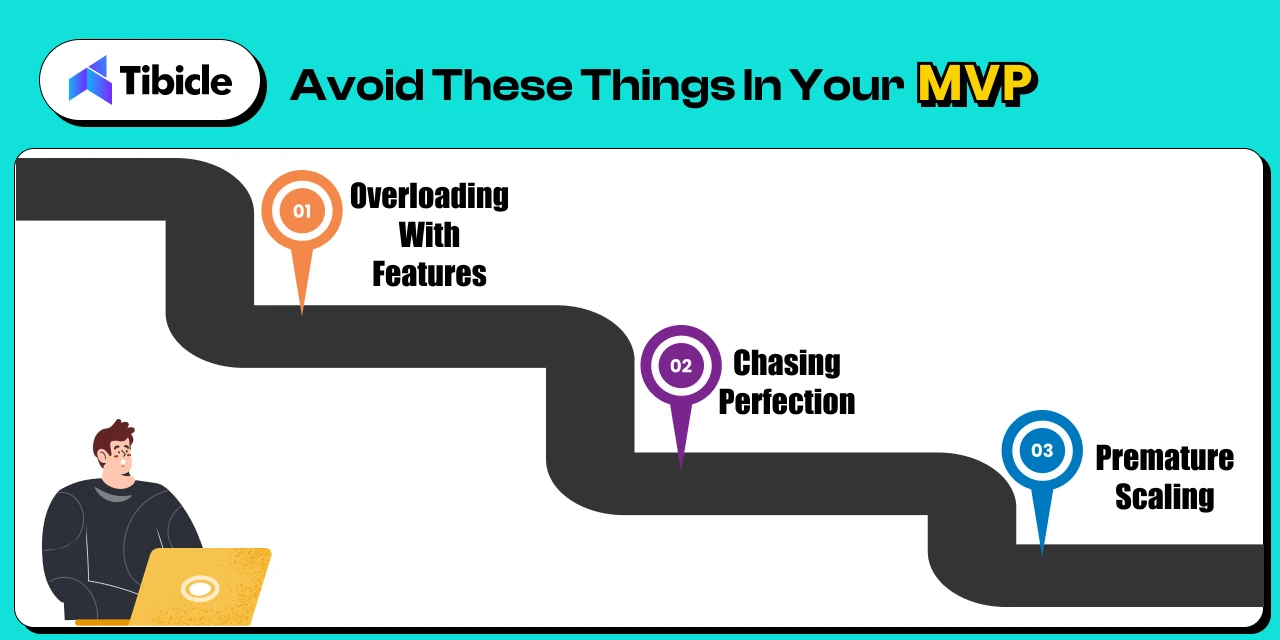
Even the most promising ideas can fail if the MVP is executed poorly. It’s not just about building quickly; it’s about creating the right product and avoiding common mistakes that waste time, resources, and user trust. Here are the three biggest pitfalls to watch out for when developing your MVP:
- Overloading with Features: Adding too many features to your MVP can overwhelm users and distract from the main problem. The purpose of an MVP is to test the essential functions, not to show every idea at once. Too many features can slow down development and make it difficult to gather clear feedback on what matters to users.
- Chasing Perfection: Delaying the launch to make the product flawless can stop you from testing your idea in the real world. An MVP should be functional and usable, not perfect. Waiting too long can waste time, miss market opportunities, and limit your learning from real user behavior.
- Premature Scaling: Expanding too quickly, whether by launching to a large audience or adding complex features before validating the MVP, can backfire. Premature scaling often wastes resources and creates unnecessary complications at this early stage. It’s important to validate, iterate, and refine before growing.
Execution Examples: Real-Life Stories
Ideas alone don’t guarantee success. Execution is what turns a concept into a thriving product.
Facebook is a prime example. It wasn’t the first social network. Friendster and MySpace came before it. What made Facebook successful was its focused execution. Mark Zuckerberg started small, targeting Harvard students, and gradually expanded to other universities. This careful step-by-step growth, combined with steady improvements and a clean product, allowed Facebook to thrive while others disappeared.
McDonald’s shows the power of execution. The McDonald brothers ran a small but innovative restaurant. Ray Kroc saw its potential. By systemizing processes, standardizing recipes, and franchising the model, he turned a small eatery into the world’s largest fast-food chain. While selling burgers wasn’t unique, executing a scalable and consistent model made all the difference.
These examples highlight a key lesson: ideas are just seeds. Execution, building, testing, iterating, and scaling thoughtfully is what helps them grow into successful ventures.
Key Takeaways
- Focus on solving the core problem with essential features.
- Launch early to gather insights from real users.
- Iterate based on actual feedback and learning.
- Avoid overcomplicating, overbuilding, or scaling prematurely.
Conclusion
Building an MVP is not just about making a bare-bones version of your ideal product; it’s about creating the right version at the right time. An MVP helps you test your assumptions, validate your idea, and learn from real users without spending too much time or money. By starting small, focusing on key features, and improving based on feedback, you position yourself for long-term success.
Whether you’re an entrepreneur, a small business owner, or someone with a concept ready to develop, the MVP approach makes sure that every decision you make is informed and strategic. It focuses on what your audience truly needs. Execution, careful planning, and ongoing learning are what turn ideas into reality.
At Tibicle, we help businesses transform ideas into scalable MVPs, whether it’s a Web App, Mobile App, SaaS platform, or AI-powered solutions. If you have an idea and want to see it come to life efficiently and effectively, we’d love to partner with you and guide you from concept to execution.
You can schedule a call from here or share your requirement from here, and our team will get back to you promptly to discuss the best approach for turning your idea into reality.
Angular 20 : New key features and updates
Introduction
The Angular team consistently focuses on improving performance and enhancing key features with each new release. It’s always exciting to see how these updates aim to make the framework more powerful and robust. The same happened in version 20, which is designed to provide faster rendering, enhance developer productivity, and offer advanced reactivity, while also simplifying legacy patterns to embrace the future of modern web development. These improvements position Angular as a leading contender for the best web development framework in 2025.
🔥 What’s New in Angular 20?
1. Signals: Now Fully Stable and Ready for Production
The Angular team consistently focuses on improving performance and enhancing key features with each new release. It’s always exciting to see how these updates aim to make the framework more powerful and robust. The same happened in version 20, which is designed to provide faster rendering, enhance developer productivity, and offer advanced reactivity, while also simplifying legacy patterns to embrace the future of modern web development. These improvements position Angular as a leading contender for the best web development framework in 2025.
Here is the list of Signal APIs that are fully stable.
-
signal() – Create a writable signal which is a reactive value container. You can update its state by calling .set() and .update() methods.
-
computed() – Create a derived signal whose value automatically gets recalculated when its dependencies change.
-
effect() – Register a side effect that triggers when the value of the signal changes.
-
toSignal() – Converts Rxjs observable to signal.
-
model() – Signal based two-way binding to simplify communication between two components.
-
viewChild() / contentChild() – Signal based template queries
-
toObservable() – Convert angular signal to Rxjs observable
-
afterRenderEffect() – Registers an effect that executes only after Angular has finished rendering the DOM.
-
linkedSignal() – Create a signal whose value is both derived from one or more source signals and directly upgradable.
-
afterNextSignal() – Register a callback that runs after every next render cycle, but only one time.
🧪 Experimental Signal APIs:
There are some experimental APIs too, which might get fully stable in upcoming versions.
-
resource() – This API is to manage async operations.
-
rxResource() – treaming versions of resource API, supporting real-time update via Rxjs-like pattern
-
httpResource() – Signal-powered HTTP request, built on HttpClient
-
Signal-based Forms – This is available for preview in this version.
2. Zoneless Change Detection
In version 20 of Angular introduced the Zoneless feature. This is something very powerful change that no one is talking about. Till now, Angular relied on Zone.js to track changes, which sometimes bottlenecks the app’s performance because the change detection keeps triggering for every small change. Zoneless change detection is now in developer preview, offering leaner and faster execution. Now the developer can decide when the zone should trigger. This may seem similar to the OnPush strategy but it’s totally different than OnPush.
How to use zoneless mode:
-
Remove zone.js from angular.json polyfills.
-
Add provideZonelessChangeDetection() to app.config.ts.
-
For new projects, use the –zoneless flag during setup.
Zoneless is a developer preview but offers great potential for performance-critical applications.
3. Modernized control flow syntax: @if, @for and @switch
The modern template syntax introduced in Angular 17 is now the preferred and more stable approach in v20. The classic structural directives (*ngIf, *ngFor, *ngSwitch) are now deprecated.
Code Example:
| @if (items().length > 0) { <ul> @for (item of items(); track item.id; let idx = $index) { <li>Item {{ idx + 1 }}: {{ item.name }}</li> } </ul> } @else { <p>No items</p> } |
4. Dynamic Component Creation
The dynamic component creation is now improved and gives support for two-way binding, directive, input and output bindings. This makes dynamic component creation easier and faster. Using the createComponent method, you can create a dynamic component.
Here is a simple example,
| import { createComponent, inputBinding, outputBinding, twoWayBinding } from ‘@angular/core’; containerRef.createComponent(ChatComponent, { bindings: [ inputBinding(‘name’, this.name), outputBinding(‘refreshName’, this.onRefresh), twoWayBinding(‘status’, this.statusSignal) ] }); |
5. Improved Template Expressions
In Angular 20, the team significantly tried to close the gap between Angular’s template syntax and standard JavaScript/TypeScript, making the template more expressive and powerful. Below are the key improvements.
- Exponentiation Operator (**) – You can now use the ** operator for power calculation.
Example,<input type=“number” [(ngModel)]=“base” placeholder=“Base” />
<input type=“number” [(ngModel)]=“exponent” placeholder=“Exponent” />
<p>Result: {{ base() ** exponent() }}</p> - “in” Operator – The angular now supports JavaScript in operator to check if a key exists in the object.
Example,<input [(ngModel)]=“propertyName” placeholder=“Property name” />
<p>
“{{ propertyName() }}” exists in circle object: {{ propertyName() in circle }}
</p> - (Un)tagged Template literals – Its now possible to write backticks in HTML and even create a custom function.Example,
<p>{{ `Hello, ${userName}!` }}</p> - Void Operator – The void operator ensures that the function always returns undefined. This is particularly useful in event binding.Example,
<button (click)=“void saveData()”>Save</button> - Operator Precedence Diagnostics – Angular 20 introduces diagnostics for unparenthesized nullish coalescing (??) mixed with logical AND (&&) or OR (||) to prevent ambiguous expressions.
Example,<!– Previously ambiguous –>
{{ name || user?.name ?? ‘Anonymous’ }}
<!– Diagnostic now recommends: –>
{{ name || (user?.name ?? ‘Anonymous’) }}
6. Incremental Hydration for Server-Side Rendering (SSR)
Server-side rendering just got smarter with Incremental Hydration. Instead of hydrating the full DOM serially, Angular 20 enables granular hydration: only the necessary components are hydrated based on user interaction or visibility. This dramatically improves Time to Interactive and overall page speed, vital for SEO and user engagement. This helps to improve the page speed of an Angular app.
7. Router Enhancements
In Angular 20, the team has introduced several router enhancements focusing more on flexibility and security.
Below are the key updates:
-
Standalone Routing API via provideRouter()
You can now configure the routing in standalone component without the need for RouterModule. Use the provideRouter function in app’s boostrapApplication. - Async Redirects support
The redirectTo property now allows async observables and promises. This helps router to make async decisions such as checking permission or checking the token. -
Smarter Route Guard and Resolving
Gaurds can now be composed with runSerially(..) – letting you run multiple guards in order for given routes - Improved Tree Shaking and Optional Features
With provideRouter, only the router features you actually use are included in your build. Previously with RouterModule, features like HashLocationStrategy, preloading and Scroll management were always bundled – even if its unused.
Example,import { provideRouter, withPreloading, PreloadAllModules } from ‘@angular/router’;
bootstrapApplication(AppComponent, {
providers: [
provideRouter(routes, withPreloading(PreloadAllModules))
]
})
8. Native Scroll Improvements
Native scroll behaviors are now supported better and configure directly through router.
Example:
Programmatically control scroll with options:
| this.scroller.scrollToPosition([0, 10], { behavior: ‘smooth’ }); |
Deprecations in Angular 20
There are some deprecations done in new version. Below are the major deprecations which you need to know.
1) Structural Directive: *ngIf, *ngFor and *ngSwitch
The classic Angular directives ngIf, ngFor and ngSwitch are now deprecated. Developer need to use the template syntax from now onwards
2) Zone.jsrelated APIs
APIs and Flags related to zone.js and experimental change detection are either renamed or not in use anymore
3) Testing Utilities:
-
TestBed.get()→ Removed (deprecated since v9). Use TestBed.inject(). -
InjectFlags enum→ Removed. -
fixture.autoDetectChanges(true/false)/code>→ The boolean parameter is deprecated/removed. Use without argument for auto detection. -
ng-reflect-*→ attributes — Not generated by default in dev mode. Can be re-enabled with provideNgReflectAttributes() for debugging. -
The
DOCUMENTtoken → Moved from@angular/commonto@angular/coreimports auto-migrated. -
HammerJS→ Legacy support is deprecated due to lack of maintenance.
Conclusion
From the Angular team, you can always expect improvements and a better development experience in their updates. This time also, the team has proved it why Angular is still the first choice for enterprise solutions. The major update in my opinion, is the Signal enhancements. You can check the Angular official documents for more information related to the updates and improvements in the new version.
Whether you’re keeping your codebase modern, seeking better performance, or adopting new Angular paradigms, now is the perfect time to upgrade and leverage all that Angular 20 offers.
If you’re planning to build an enterprise-level application, our expert team is here to help. We specialize in architecting, designing, and deploying large-scale web solutions using the latest technologies. Get in touch with us today to discuss your project and see how we can accelerate your success!
Feel free to schedule a call from here to meet with our experts and discuss your ideas in detail. You can also share your requirements here, and our team will get back to you.
Custom Software Development to Scale Your Business in 2026
🚀 The Need for Custom Software in a Fast-Paced World
In today’s digital landscape, custom software development in 2026 is crucial for businesses scaling faster than ever. However, generic, off-the-shelf software simply isn’t cutting it anymore. From clunky workflows to unnecessary features, pre-built solutions often create more bottlenecks than breakthroughs.
That’s where custom software development comes in. It’s not just about having a product tailored to your needs — it’s about building a scalable foundation that grows with you, adapts to market shifts, and keeps you ahead of the competition.
💡 What is Custom Software?
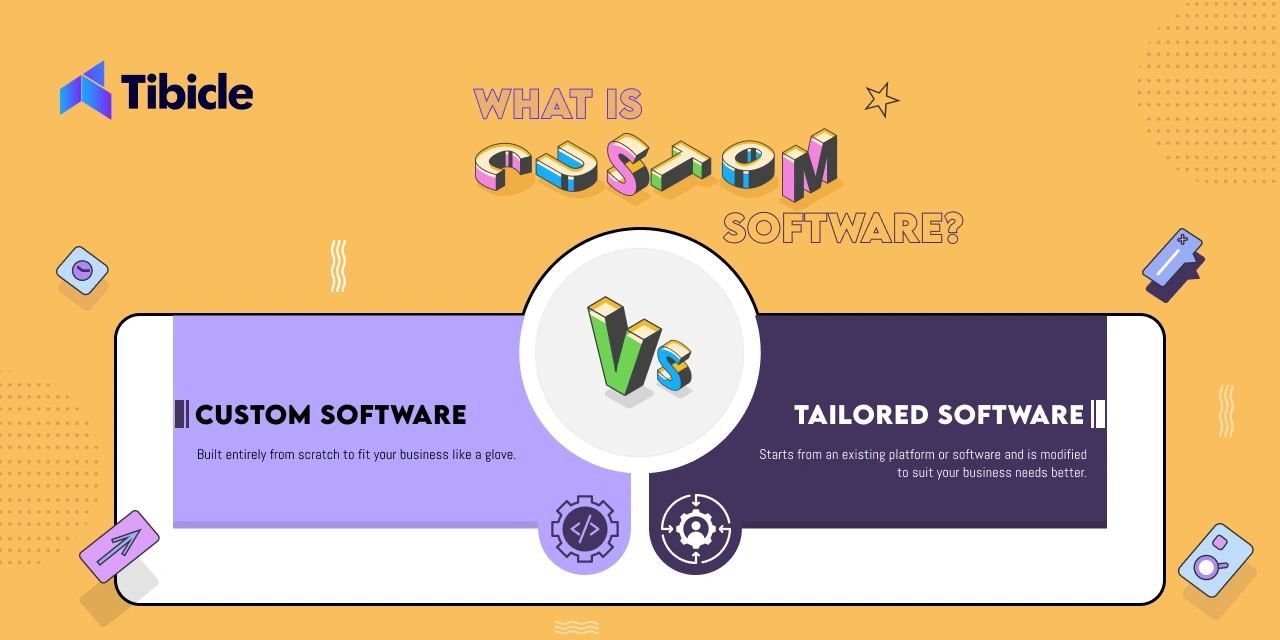
Custom software is specifically designed and developed to meet the unique needs of a business, unlike generic software that offers the same features to all users. It’s built from the ground up to address your exact requirements, streamline processes, and integrate seamlessly with your existing systems.
🔍 Custom Software vs. Tailored Software — What’s the Difference?
While these terms are often used interchangeably, they have distinct differences:
- Custom Software: Built entirely from scratch to fit your business like a glove. It’s fully unique, offering a competitive edge and designed to evolve with your growth.
- Tailored Software: Starts from an existing platform or software and is modified to suit your business needs better. It’s faster to develop but may have limitations compared to fully custom solutions.
In short, if you’re scaling rapidly and need a strategic edge, custom software is the smarter, long-term investment.
💡 Why Custom Software Beats Off-the-Shelf Solutions
-
Tailored to Your Business Needs: You no longer need to compromise. Instead of adjusting your processes to fit a tool, the tool adapts to fit you.
-
Scalability Built-In: As your business grows, your software should grow with you — without the need for expensive upgrades or risking performance drops.
-
Competitive Edge: Custom solutions offer unique features that competitors simply don’t have. For instance, whether it’s a personalized customer experience or an innovative backend process, you control what makes you stand out.
-
Seamless Integration: Off-the-shelf solutions often struggle to integrate with existing systems. In contrast, custom software connects effortlessly, eliminating data silos and boosting efficiency.
-
Cost Efficiency in the Long Run: Although custom development requires a higher upfront investment, it reduces long-term costs. There are no recurring license fees, fewer productivity losses, and no need for platform changes every few years.
🛠️ The Process: From Concept to Scalable Product
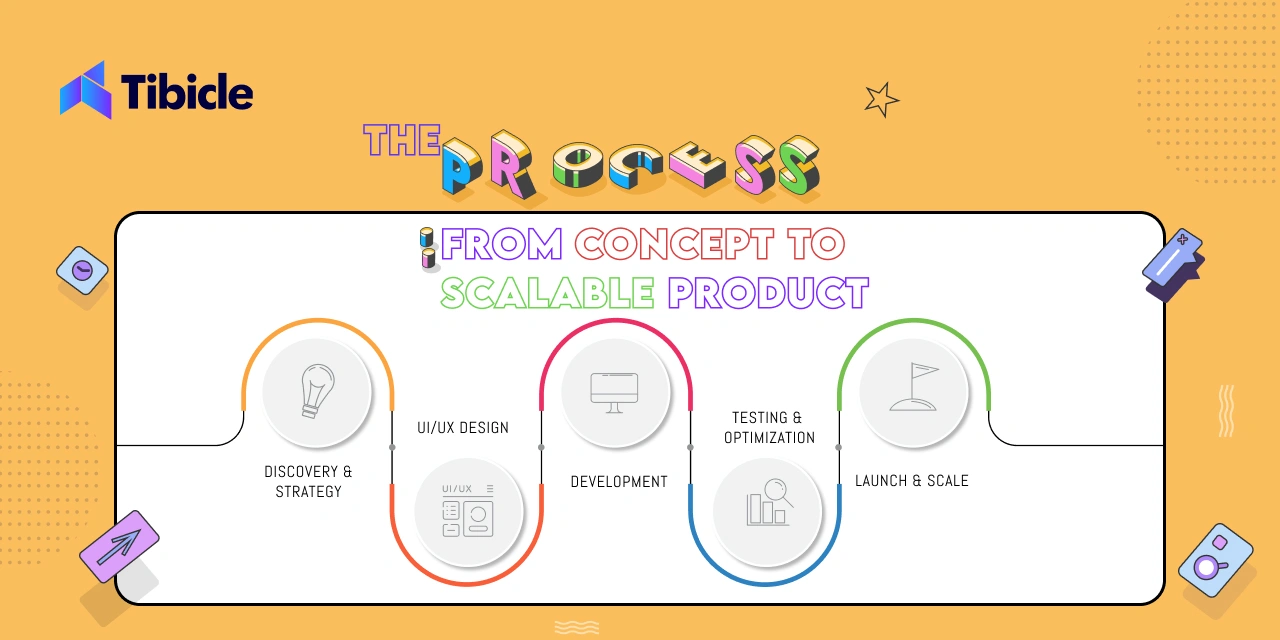
At Tibicle,, we follow a proven, end-to-end development process to ensure your custom software isn’t just functional — it’s a launchpad for growth.
- Discovery & Strategy: We dive into your business goals, challenges, and processes to define what success looks like.
- UI/UX Design: User experience isn’t an afterthought — it’s a driving force. We design clean, intuitive interfaces to ensure users engage and convert.
- Development: Our full-stack development team builds robust backends and sleek frontends, ensuring your software is fast, secure, and scalable.
- Testing & Optimization: Rigorous testing ensures everything works flawlessly. We refine performance, squash bugs, and optimize for maximum efficiency.
- Launch & Scale: We don’t just hand you the keys and walk away — we support your launch, monitor performance, and adapt as your business evolves.
🔥 Choosing the Right Development Partner
Custom software is only as good as the team behind it. When selecting a development partner, look for:
- Proven Experience: A track record of delivering scalable, user-friendly solutions.
- Full Product Lifecycle Expertise: From UI/UX to backend infrastructure.
- Agile Approach: Rapid iterations, continuous feedback, and adaptability.
- Commitment to Your Vision: A team that collaborates closely with you, not just builds what you say.
Tibicle brings all this — and more — to the table.
🎯 Conclusion: Scale Smarter, Not Harder
Scaling your business in 2026 isn’t about working harder — it’s about working smarter. Custom software development gives you the flexibility, performance, and innovation edge you need to grow on your terms.
Ready to ditch generic solutions and scale with confidence? Let’s build something powerful — together.