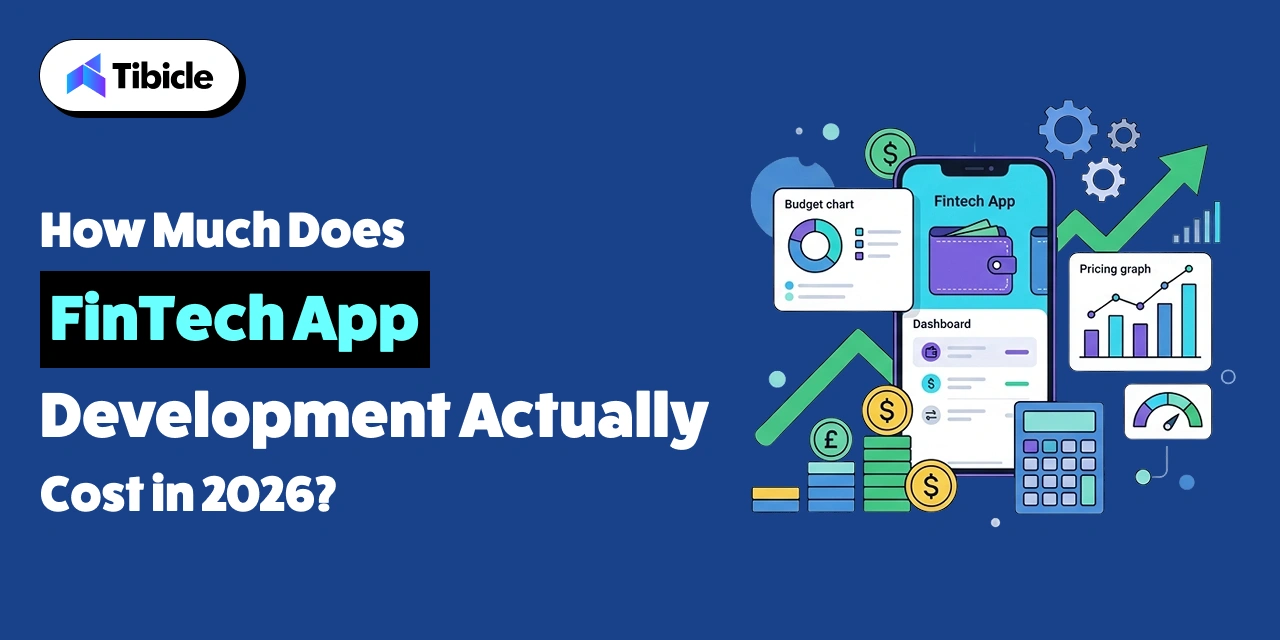
Introduction
eCommerce app development cost is one of the most important considerations for brands planning a mobile commerce strategy in 2026. Global mobile commerce is projected to account for 59–62% of all eCommerce sales by 2027, making mobile apps a revenue-critical investment for online retailers.

Yet most decision-makers approach it without a clear financial framework. eCommerce app development cost ranges from $25,000 to $250,000 or more, depending on scope, and the gap between those numbers is not arbitrary. It reflects choices around features, platform, team model, and business model that directly determine ROI.
The problem with most cost guides is that they publish a price range without connecting it to business outcomes. The document takes a different approach, breaking down the costs of developing eCommerce apps by app type, complexity, features, platform, and team location. It then correlates each cost variable with measurable returns. Whether you are a founder evaluating your first mobile commerce investment or a CTO benchmarking vendor quotes, this guide gives you the data to make a budget-backed decision.
It will cover actual pricing tiers, feature-level cost drivers, platform trade-offs, ROI benchmarks, and a vendor evaluation checklist to help you move from budget confusion to building confidence.
What is eCommerce App Development?
eCommerce app development is the process of designing, building, and deploying a mobile or web application that enables businesses to sell products or services digitally. Unlike a standard website, a dedicated app offers persistent sessions, push notifications, biometric checkout, and native device integrations that consistently outperform mobile web on conversion and retention metrics.
Understanding what you will pay begins with understanding which type of app you are building, because each model carries a different scope and budget profile.
Types of eCommerce Apps and Their Business Models
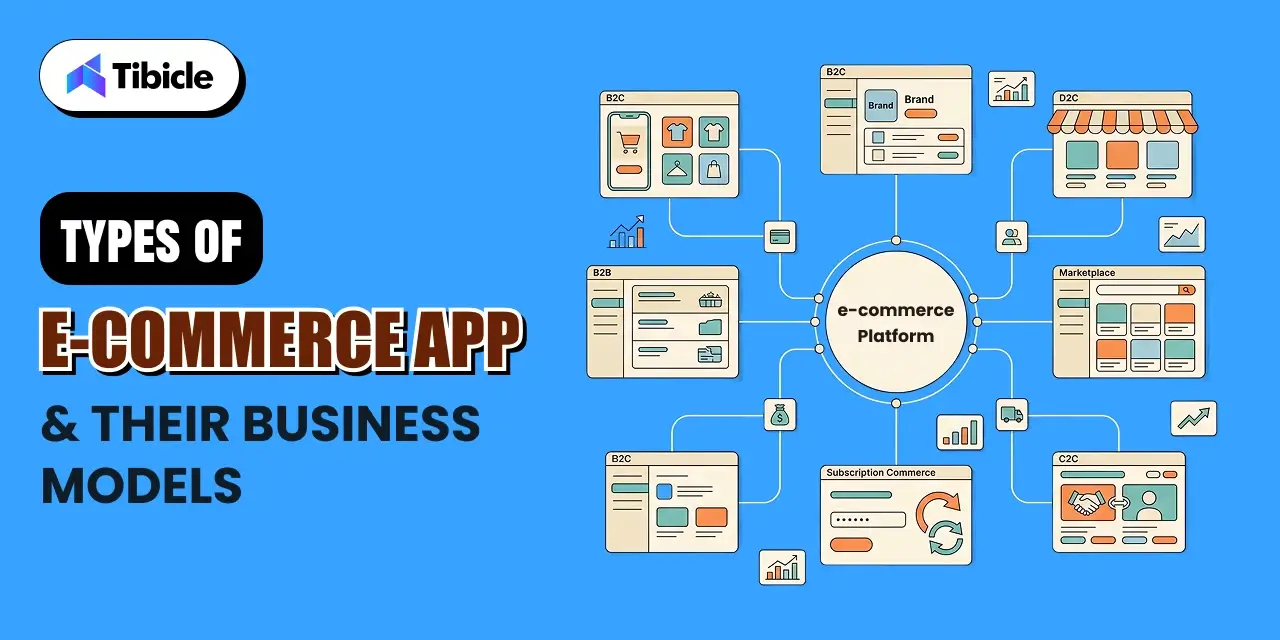
B2C (Business-to-Consumer): Brands sell directly to individual shoppers. Cost is driven by UI depth, personalisation engines, and third-party payment integrations.
B2B (Business to Business): Companies sell to other businesses at scale. Higher complexity due to bulk ordering logic, tiered pricing, and account management workflows.
C2C (Consumer to Consumer): Peer-to-peer marketplaces where users buy and sell. Requires seller onboarding, escrow logic, and dispute resolution systems.
D2C (Direct to Consumer): Brands bypass retailers and sell directly. Subscription billing, loyalty programs, and retention flows are the primary cost drivers.
Marketplace: Multi-vendor platforms where multiple sellers list products. The most complex model requires split payments, seller dashboards, and commission tracking.
Subscription: Recurring billing apps with membership gating and dunning flows add 20 to 30 % to the base build cost.
How Much Does eCommerce App Development Cost in 2026?
The cost to build an eCommerce app in 2026 varies significantly based on complexity, team location, and platform choice. There is no universal number, but there are reliable tiers that correlate with feature scope and business stage.
Businesses recoup eCommerce app development cost within 6 to 18 months on average, with an ROI of up to 10x compared to mobile web. That return profile makes the investment defensible even at the higher end of the pricing spectrum, provided the build is scoped correctly.
Cost by App Complexity Tier
| Tier | Features Included | Estimated Cost | Timeline |
| Basic / MVP | Catalog, cart, payments, user accounts | $25,000–$60,000 | 2–4 months |
| Mid-Tier | AI recommendations, loyalty, analytics, multi-payment | $60,000–$150,000 | 4–6 months |
| Enterprise / Advanced | Custom ERP, multi-currency, AR, marketplace logic | $150,000–$300,000+ | 6–10 months |
Key Factors That Influence eCommerce App Development Cost
Understanding what drives the overall cost is more useful than any single number. The following variables account for the majority of budget variance across projects.
Feature Complexity and Scope
Feature selection is the single largest cost driver in your overall mobile commerce budget. Below is a feature-wise cost breakdown based on current market rates:
| Feature | Estimated Cost Range |
| Payment Gateway Integration | $3,000–$15,000 |
| AI Personalisation Engine | $10,000–$30,000 |
| AR Try-On / Visualisation | $15,000–$40,000 |
| Admin Dashboard | $5,000–$20,000 |
| Push Notification System | $2,000–$8,000 |
AR visualisation is the fastest-rising cost driver in 2026. Brands in fashion and furniture are investing in it because it measurably reduces return rates and lifts average order value. Despite its premium price tag, the ROI case is well-documented.
Platform Choice: Native vs. Cross-Platform
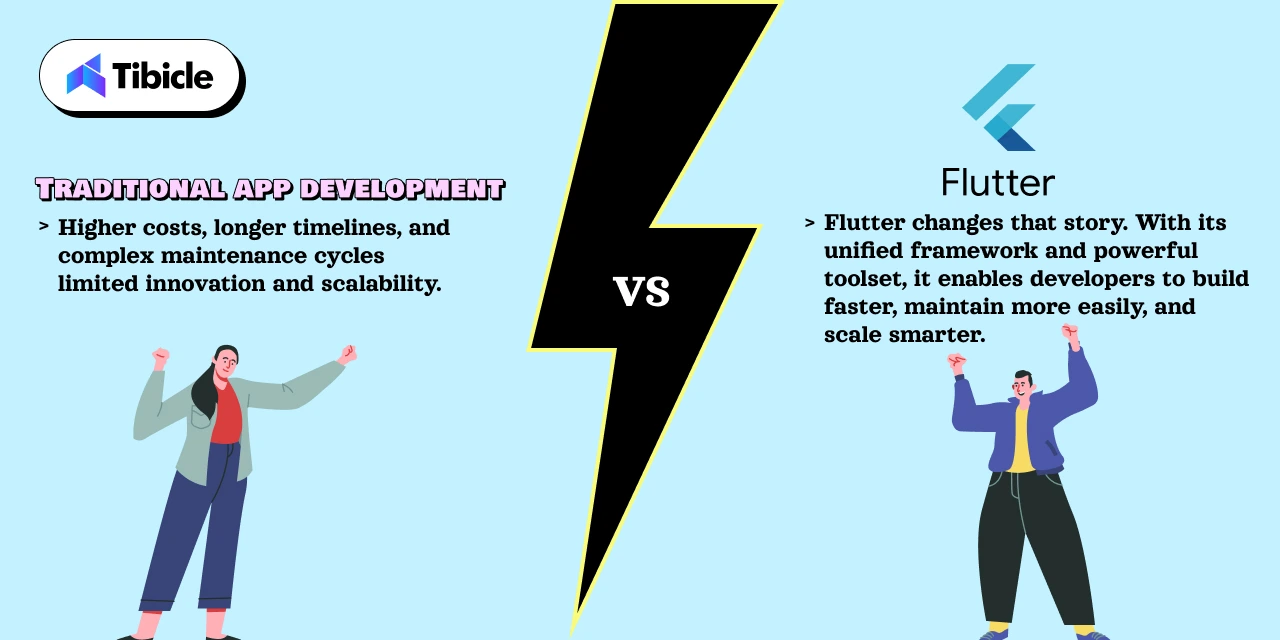
Platform decision is the second major lever on the eCommerce mobile app development cost. Building separate native apps for iOS and Android adds 40 to 60 % to the total cost. Cross-platform frameworks such as Flutter and React Native enable a single codebase to power both platforms, reducing build time and maintenance overhead without a significant performance trade-off in most retail use cases.
For most B2C and D2C brands, cross-platform ecommerce app development is the financially rational choice.
Development Team Location and Model
| Region | Hourly Rate |
| US / Canada | $100–$200/hr |
| Western Europe | $80–$150/hr |
| Eastern Europe | $40–$80/hr |
| South Asia | $20–$50/hr |
The team model also shapes total cost. In-house teams offer control but require full employment overhead. Agencies deliver structured delivery with higher rates. Freelancers reduce cost but introduce coordination and accountability risk. For mid-tier builds, a specialist ecommerce agency with a nearshore or South Asian delivery model offers the best balance of cost and quality.
Backend Infrastructure and Third-Party Integrations
Enterprise ecommerce apps require integrations across ERP systems, CRM platforms, payment gateways, and cloud hosting environments. Each integration adds scoping and development hours. App store fees take 30% of in-app revenue; cloud hosting and scaling add $1,000 or more per month, depending on traffic; and annual maintenance costs 15 to 20% of the original build cost. In aggregate, these post-launch costs inflate the total investment by approximately 25% over the first year.
eCommerce App Development Cost by Business Model
Online store app pricing differs significantly by business model. Each model introduces distinct technical requirements that shift the cost envelope.
B2C App Pricing
B2C eCommerce apps typically cost between $30,000 and $120,000. Cost is primarily driven by UI depth, personalisation layers, and third-party integrations such as loyalty platforms, review systems, and dynamic pricing engines. High-volume B2C apps with complex catalogue management and recommendation logic trend toward the upper end of this range.
B2B and Marketplace App Pricing
B2B and marketplace apps carry a higher eCommerce app development cost, ranging from $80,000 to $250,000 or more. Multi-vendor dashboards, split payment logic, seller onboarding workflows, and tiered access controls each add significant scope. Marketplace logic alone can add $40,000 to $80,000 to a mid-tier build.
Subscription and D2C App Pricing
Recurring billing logic, dunning automation, membership gating, and cohort-based analytics add 20 to 30 % to the development budget for subscription and D2C models. These apps also tend to require deeper CRM integrations to support lifecycle marketing workflows.
Native vs. Cross-Platform vs. PWA: Cost and Performance Compared
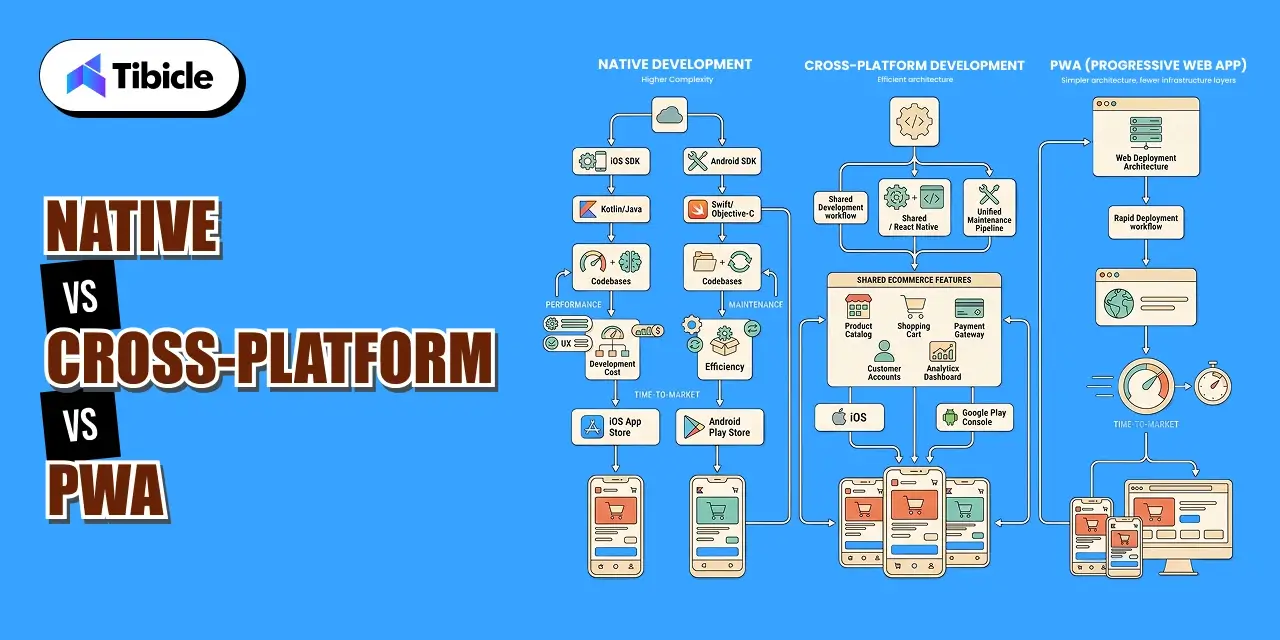
Technology architecture is one of the highest-leverage decisions in managing your total development investment. The following comparison covers the three primary build approaches:
| Parameter | Native (iOS + Android) | Cross-Platform (Flutter/React Native) | PWA |
| Build Cost | $80K–$250K+ | $40K–$150K | $15K–$50K |
| Time to Market | 6–10 months | 3–6 months | 2–4 months |
| Performance | Highest | Near-native | Limited |
| Maintenance Cost | High (two codebases) | Moderate (single codebase) | Low |
| Best For | Enterprise, high-volume retail | Most B2C/D2C brands | Early validation |
Cross-platform frameworks now cover more than 90% of standard eCommerce use cases without a meaningful performance gap for most retail applications. Flutter and React Native ecommerce builds have become the default recommendation for brands that want near-native performance at a 40 to 60 % lower cost than separate native builds.
The decision framework for senior leadership is straightforward: match platform choice to revenue stage. PWA for early validation, cross-platform for growth-stage B2C and D2C, native only when scale and performance demands justify the premium.
How to Reduce eCommerce App Development Cost Without Compromising Quality
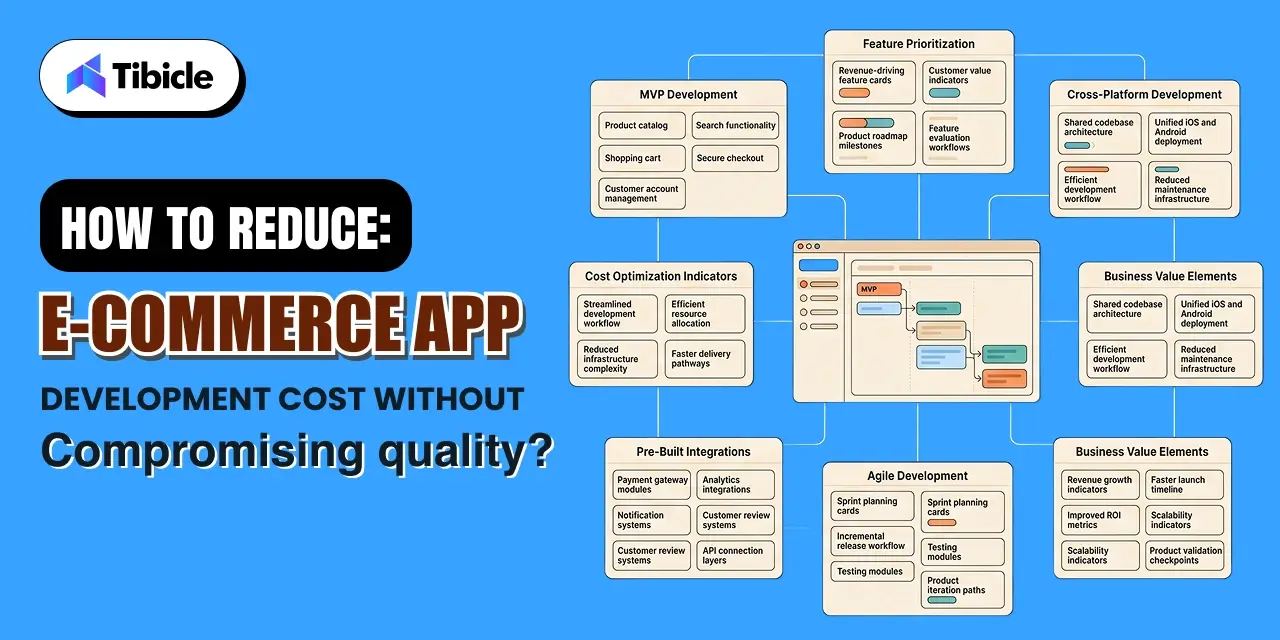
Reducing eCommerce app development cost is not about cutting corners. It is about sequencing investment to match validated demand. The following strategies consistently deliver better outcomes at lower upfront spend.
Start With an MVP
Validate five core user flows before building thirty features. Those five flows are: search, product detail, cart, checkout, and account management. An MVP ecommerce app in the $18,000 to $30,000 range that drives real conversions is more strategically valuable than a $90,000 feature-complete build that has not been tested against actual user behaviour. This approach reduces upfront ecommerce app development cost by 40 to 60%.
Prioritise Features by Revenue Impact
Payments and cart functionality drive approximately 80 % of direct revenue from an eCommerce app. Add AI personalisation, AR features, and loyalty programs only after you have validated demand and have the user volume to measure their impact. Premature feature investment is one of the most common causes of cost overrun.
Use Pre-Built SDKs and APIs
Payment integrations via Stripe, Braintree, or PayPal eliminate the cost of building a custom payment engine. Similarly, pre-built SDKs for push notifications, analytics, and review systems reduce development time significantly. This approach can cut feature development cost by 20 to 35% across a mid-tier build.
Offshore Strategically
India-based development teams deliver savings of up to 60 % compared to US and Canada rates. For mid-tier eCommerce app development scope, quality trade-offs are minimal when working with an established agency. Notably, hourly developer rates dropped 9 to 16% globally in 2025 to 2026 as AI-assisted development tools compressed delivery timelines, improving the cost per deliverable across all regions
ROI of Investing in an eCommerce App: What the Data Shows
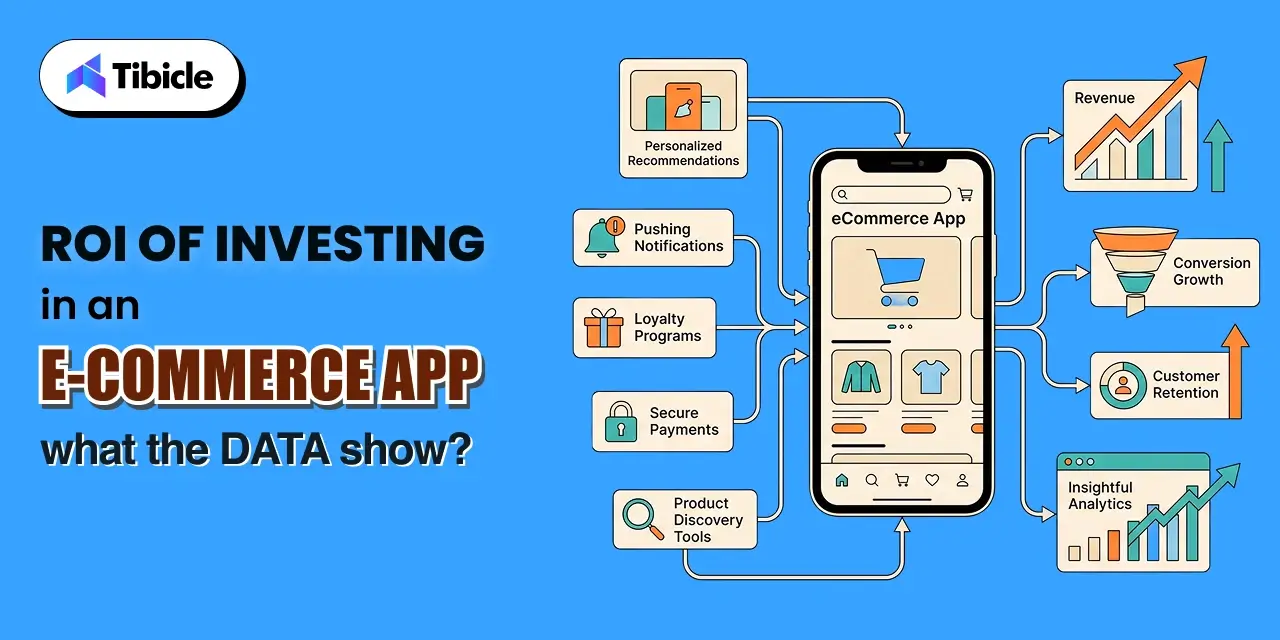
eCommerce app development cost is only half the equation. The other half is quantified return. The data consistently shows that branded mobile apps outperform mobile web on every revenue metric that matters.
Revenue Uplift and Conversion Gains
App conversion rates average 4.5 % compared to 1.5 % on mobile web, a 3x advantage that compounds with scale. App users spend three times more per session and return to the store twice as often. AI-powered ecommerce apps generate 20 to 30 % more revenue than mobile websites. These are not marginal differences. They fundamentally change the return profile of the investment.
Measuring ROI Across Three Horizons
“The central question for leadership teams is whether these investments produce measurable commercial returns.”
Short-term (0 to 90 days): Track install rate, activation rate, and checkout conversion rate versus mobile web. These metrics establish the baseline.
Mid-term (90 days to 12 months): Monitor monthly active users, average order value (app users have 140% higher AOV than mobile web), and push-notification recovery rate for abandoned carts.
Long-term (12 months and beyond): Measure customer lifetime value per app user, repeat purchase frequency, and net promoter score. App users consistently show higher LTV than any other acquisition channel.
Case-Level Proof Points
Starbucks reported a 30 % increase in customer retention and a 22% lift in mobile orders following its app investment. Sephora saw a 25 % increase in in-app purchases after deploying AI-powered recommendations. These benchmarks are instructive: the ROI from this investment scales with retention-first feature design, not with feature volume.
Mini Case Study: How a Mid-Market Fashion Retailer Recovered Its Build Cost in 8 Months
The Retailer: A mid-market fashion brand generating $6 million in annual ecommerce revenue. Mobile traffic accounted for 68 % of total sessions, but the mobile conversion rate sat at just 1.4 % – against a desktop conversion rate of 3.8 %.
The Problem: The brand was haemorrhaging revenue at two points. First, mobile checkout abandonment was costing an estimated $180,000 annually; customers were browsing on mobile and switching to desktop to buy. Second, a 34 % product return rate driven by sizing uncertainty was compressing margins faster than new customer acquisition could compensate.
The Implementation: The brand invested $72,000 in a cross-platform Flutter app scoped around four features directly tied to the two problems above: one-tap checkout with Apple Pay and Google Pay, an AI personalisation engine serving dynamic product feeds, AR-based virtual try-on for their top 200 SKUs, and behaviour-triggered push notifications for cart abandonment recovery. The build ran from discovery to launch in 14 weeks.
The Results: 12 Months Post-Launch
- Mobile conversion rate lifted from 1.4 % to 3.6 %- a 157 %improvement
- Return rate on AR-enabled products fell from 34 % to 19 %
- Average order value increased by 28 % through AI-powered cross-sell recommendations
- Abandoned cart push notifications recovered $94,000 in attributed revenue in year one
- Full development cost recovered within 8 months of launch
The Lesson: The investment paid back not because of how many features were built, but because each feature was matched to a specific, measurable revenue problem. That alignment came from a structured discovery phase before a single line of code was written, which is the variable that separates ecommerce app investments that pay back from those that do not.
Common Risks and Challenges in eCommerce App Development
Understanding the risks is as important as understanding what you will pay to build. The following categories account for the majority of project failures and cost overruns.
Scope Creep and Budget Overruns
Scope creep is the most common cause of 25 % or greater cost inflation in eCommerce app projects. Every unplanned feature added mid-build extends timelines and disrupts delivery rhythm. Mitigation requires milestone-based contracts with defined deliverables and a change-impact review process for any scope addition. Agile delivery with fixed sprint scope is more reliable than open-ended time-and-materials arrangements.
Post-Launch Hidden Costs
Most project estimates do not account for what happens after launch. Annual maintenance averages 15 to 20 % of the original build cost. Apple and Google app store fees take 30% of in-app revenue. Cloud infrastructure scales with traffic, adding $1,000 or more per month at meaningful volume. Budget planning should account for the year-two total cost of ownership, not just the build cost.
Poor Vendor Selection
Quotes below $5,000 to $10,000 for custom eCommerce app development almost always mean template-heavy builds with limited scalability, no discovery phase, and minimal post-launch support. The cost of rebuilding a poorly scoped app typically exceeds the cost of building it correctly the first time.
Security and Compliance Gaps
PCI DSS compliance is required for any app processing card payments. GDPR applies to any app serving EU users. Building compliance into the architecture from the start adds cost but protects against regulatory penalties and reputational risk that would far exceed the investment. Do not treat compliance as an optional scope.
Vendor Selection Checklist: How to Choose the Right eCommerce App Development Partner
Selecting the right development partner is as consequential as any feature or platform decision. The following framework directly affects the quality and value you will receive from your investment.
10-Point Evaluation Framework
- Proven eCommerce portfolio, not just generic mobile app development experience.
- The discovery and product strategy phase is included in the engagement, not treated as optional.
- Transparent cost breakdown by project phase, not a single undifferentiated lump sum.
- Cross-platform expertise in Flutter or React Native eCommerce development.
- Post-launch maintenance and support with a defined SLA.
- Scalability architecture that anticipates growth beyond MVP scope.
- Integration capability across ERP, CRM, and payment gateway systems.
- Clear communication cadence and structured project management tooling.
- Client references with documented ROI data from comparable eCommerce builds.
- IP ownership and contract terms that clearly assign code ownership to the client.
Need a partner who meets every criterion on this list? Tibicle’s eCommerce development team can scope your project with a transparent phase-wise cost breakdown.
Why Tibicle Is a Strong Choice for eCommerce App Development
Tibicle’s approach to eCommerce app development is built around the same evaluation framework described above. The team specialises in Flutter and React Native ecommerce builds for mid-market B2C and D2C brands that need scalable mobile commerce apps without enterprise-level budgets and timelines.
The engagement model starts with a structured discovery phase before any code is written. That product strategy step aligns build scope to revenue goals, which is the primary mechanism for controlling budget and reducing scope creep before it starts.
Pricing is delivered in transparent phase-wise breakdowns. Clients see exactly what each phase costs, what it delivers, and how it connects to the next. Post-launch support is provided under a defined SLA, not treated as a bonus service.
For brands evaluating mobile commerce investment with a team that can demonstrate measurable ROI from previous builds, Tibicle offers a practical and commercially transparent option within the vendor landscape.
Talk to Tibicle’s ecommerce team to get a detailed cost estimate and project roadmap for your app.
Conclusion
eCommerce app development cost in 2026 is shaped by four variables: complexity tier, platform choice, feature scope, and development team model. A basic MVP eCommerce app starts at $25,000. An enterprise-grade platform can exceed $300,000. The right investment decision is not about picking a number from a range. It is about matching scope to your current revenue stage and measuring return across short, mid, and long-term horizons.
Apps outperform mobile web on every measurable commerce metric. The ROI case is well-established. The remaining question is not whether to invest, but how to scope the investment correctly.